

Creative Writing Process: 8 Essential Stages for a Strong Writing Workflow
If you’ve ever stared at a blank page and thought, “I know I can write… So why can’t I start?” you’re not alone. Most writers don’t struggle because they lack talent—they struggle because they don’t have a reliable creative writing process. Not a rigid system that kills creativity, but a workflow that helps you move from idea → draft → revision → final story without getting stuck in the same loop.
This guide is built for U.S. writers and students who want practical clarity. Whether you’re writing a short story for class, a novel you want to publish, or a fictional narrative you hope readers will actually finish and recommend, you’ll find a complete step-by-step method here. No robotic teaching voice. Just a clear way to work—plus a professional path if you want help polishing the final result.
What is the creative writing process?
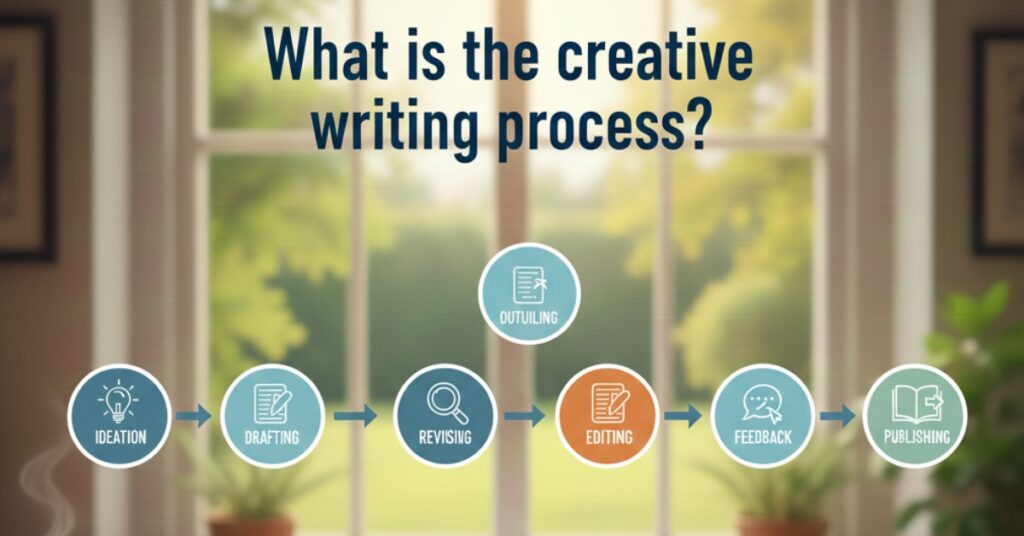
The creative writing process is the set of steps writers use to develop, draft, revise, and finish a piece of creative work. It includes everything from brainstorming and outlining to drafting, self-editing, getting feedback, and proofreading.
Some writers do it in a neat order. Others bounce around. But the strongest creative writing workflow usually includes the same core stages:
- Idea and discovery
- Planning (light or detailed)
- Drafting
- Revising (structure and meaning)
- Editing (clarity and style)
- Proofreading (final polish)
You can write without a process. But if you want consistency—especially for longer projects like novels—having a repeatable workflow is what keeps you moving when motivation fades.
The complete creative writing process (step by step)
Step 1: Capture the spark (brainstorming without pressure)
Most story ideas don’t arrive as complete plots. They arrive as:
- a character you can’t stop thinking about
- a “what if” question
- a setting that feels alive
- a conflict you recognize from real life
Simple brainstorming tools that work:
- Freewriting for 10 minutes: write anything your brain offers
- Mind mapping: start with one idea and branch outward
- Story prompts: pick one and twist it to fit your voice
- “What does my character want, and what blocks them?”
A useful filter is this: Does the idea create a problem that forces choices?
If it does, you’re already close to a workable fictional narrative.
Step 2: Choose your “anchor” (one sentence that guides everything)
Before you outline, write one sentence that makes the story concrete.
Try this format:
A (character) wants (goal) but (obstacle), so (stakes).
Example:
“A single mom in Phoenix wants to pass her nursing boards, but her ex keeps sabotaging childcare, so her shot at stability is slipping.”
That one sentence becomes your compass. If a scene doesn’t connect to the goal, obstacle, or stakes, it’s probably not doing enough work.
Step 3: Decide how you’ll plan (plotter vs pantser—both are valid)
Most writers fall somewhere between:
- Plotters: outline first, draft second
- Pantsers (discovery writing): draft to discover the story
In reality, many writers use a hybrid:
- outline the big turning points
- discovery-write the scenes
If you hate outlining, start with a “light plan”:
- beginning situation
- inciting incident (what disrupts normal life)
- midpoint twist (new information or reversal)
- climax (forced choice)
- resolution (new normal)
This is enough structure to prevent the draft from wandering while still leaving room for surprise.
Step 4: Build a simple story structure (so the plot actually moves)
A strong story—short or long—usually relies on clear escalation.
A practical structure (works for most genres):
- Exposition: introduce character + normal life + tension simmering underneath
- Inciting incident: something changes and demands action
- Rising action: obstacles stack; choices narrow
- Climax: the character must act—no avoiding it
- Resolution: the outcome and what changed
If your draft feels “slow,” it’s often because the inciting incident arrives too late or the rising action isn’t escalating (same problem, same response, repeat).
Step 5: Develop your characters (so readers stay emotionally invested)
Readers don’t commit to plot—they commit to people.
For a believable character arc, clarify:
- Goal: what they want (specific, measurable if possible)
- Motivation: why they want it
- Wound or fear: what they’re protecting themselves from
- Flaw: the strategy that worked before but won’t work now
- Change: what they learn or accept by the end
A simple way to strengthen characterization:
- give your character a public self and a private self
- then put those in conflict
That tension creates depth without pages of backstory.
Step 6: Choose your point of view and voice early (to avoid messy rewrites)
Point of view (POV) shapes intimacy and suspense:
- First person: close, personal, immediate
- Third person limited: modern, flexible, still intimate
- Omniscient: wide lens, more distance
Also consider:
- narrative voice (how the narrator sounds)
- tone (your attitude toward the story)
- mood (what the reader feels)
When you keep POV and voice consistent, revision becomes easier and your story feels professional.
Step 7: Draft your “Draft Zero” (give yourself permission to be imperfect)
This is where many writers freeze—because they try to write a final draft on the first attempt.
Instead, write a Draft Zero:
- messy is allowed
- placeholders are allowed (“[research later]”)
- weak lines are allowed
- the goal is completion, not perfection
A very useful drafting mindset:
Write fast, fix later.
If you keep stopping to polish, you train your brain to associate writing with judgment. Drafting should feel like movement.
Step 8: Revise in layers (don’t edit everything at once)
Revision is where good stories become publishable stories.
Use a layered revision strategy:
Layer 1: Structure (big-picture revision)
Ask:
- Does the story start in the right place?
- Is the inciting incident clear?
- Does conflict escalate?
- Are stakes present in every major section?
- Does the climax force a real choice?
Layer 2: Character and theme
Ask:
- Does the protagonist’s motivation make sense?
- Does the character change by the end?
- What is the theme really saying, through choices and consequences?
Layer 3: Scene-level revision
Check each scene:
- What does the character want here?
- What blocks them?
- What changes by the end of the scene?
If a scene doesn’t change anything, it usually needs a purpose upgrade—or it needs to go.
Layer 4: Line editing (clarity, flow, style)
This is where you refine:
- dialogue (subtext, rhythm, voice)
- pacing (scene vs summary balance)
- sentence clarity and tone
- “show vs tell” adjustments
Layer 5: Proofreading
This is last, always.
Proofreading too early is how writers waste time polishing paragraphs they later delete.
Writer’s block: what it really is (and how to move through it)
Writer’s block often isn’t a lack of ideas. It’s usually one of these:
- unclear character goal
- unclear conflict
- fear of writing badly
- not knowing what happens next
Quick fixes that work:
- write the next scene as bullet points first
- ask: “What would make this worse?”
- change the setting slightly (pressure creates action)
- write a “bridge paragraph” to connect two scenes
- set a 15-minute timer and freewrite the scene without stopping
Most of the time, block disappears when the story regains clarity.
A practical creative writing workflow you can actually follow
If you want a simple routine (especially for U.S. students, busy professionals, or parents), try:
- 3 days a week drafting (30–60 minutes each)
- 1 day revision review (notes only—no heavy edits)
- 1 day focused rewrite (one scene or one chapter)
- Keep a “parking lot” doc for ideas so you don’t derail your draft
Creative work loves consistency more than intensity.
Tools that help
Use whatever helps you stay consistent:
- Google Docs or Microsoft Word (simple and reliable)
- Scrivener (good for long projects)
- Notes app + voice memos (for idea capture)
- A versioning habit (“Draft_01,” “Draft_02”) so you don’t lose progress
Tools don’t write stories—habits do. Keep it lean.
Where US Writers can help
If you have a draft but you’re unsure whether it’s working—or you keep revising the same chapters—professional help can shorten the entire timeline.
At US Writers, the most common support points for the creative writing process are:
- Story planning support (outline, structure, pacing map)
- Developmental feedback (plot logic, character arc, stakes)
- Line editing (voice consistency, dialogue, flow)
- Proofreading for submission-ready polish
This is especially valuable when you’re writing a fictional narrative and you need it to feel seamless—like the story always knew where it was going, even if you discovered it along the way.
Conclusion
A strong creative writing process isn’t about being rigid—it’s about building momentum. When you separate drafting from editing, revise in layers, and keep character goals and conflict clear, you stop spinning your wheels and start finishing stories. That’s how a fictional narrative becomes something readers can trust.
If you want professional guidance—whether you’re stuck in the middle, unsure about structure, or ready for polish—US Writers can help you move from “draft” to “final” with clear, supportive feedback and editing that keeps your voice intact.
FAQs about the creative writing process
1) What is the creative writing process, really?
The creative writing process is the workflow you use to move from idea to final draft—typically brainstorming, planning, drafting, revising, editing, and proofreading. The “best” process is the one you can repeat consistently.
2) What are the steps in the creative writing process for beginners?
Start simple: capture an idea, write a one-sentence premise, choose a light outline (beginning/middle/end), draft quickly, then revise in layers (structure first, then style). Beginners improve fastest when they finish drafts instead of perfecting pages.
3) Do I need an outline to write a good story?
No. Many writers discovery-write (pantsing) and outline afterward. But most writers benefit from at least a few turning points—inciting incident, midpoint shift, climax—so the story doesn’t lose direction.
4) How do I write a strong fictional narrative from start to finish?
Focus on clarity: a protagonist with a specific goal, escalating conflict, meaningful stakes, and a climax that forces a hard choice. Then revise for structure and character arc before polishing the language.
5) What should I focus on in the first draft vs later drafts?
In the first draft, focus on finishing the story and getting the main events on the page. In later drafts, focus on structure, character motivation, pacing, dialogue, and voice consistency.